
4.4 Running a module on AnVIL
4.4.0.1 Purpose
In this section we will go over how to run C-MOOR modules on AnVIL. We will go over how to create an RStudio environment in that workspace to run the module and properly end a session on AnVIL to prevent runaway costs.
4.4.0.2 Learning Objectives
- Launch a module through the cloned workspace
- Close out a session on AnVIL properly to prevent runaway costs
4.4.1 What is a workspace?
The workspace is the heart of AnVIL. Here are some key points about workspaces:
- Every workspace comes with its own Google Bucket (our cloud storage). Your bucket will be empty.
- Every workspace has its own billing project. Students who are not yet associated with a billing project will not be able to compute on their workspace.
- We can control access levels of users and set them either as owners, writers, or readers. Students will be writers with compute access.
4.4.2 Running modules on AnVIL
4.4.2.1 Starting a module on AnVIL
When you open the workspace, you will be on the dashboard tab by default. The dashboard contains the instructions on how to use the workspace, links to C-MOOR websites, and the startup script. Let’s try running a module.
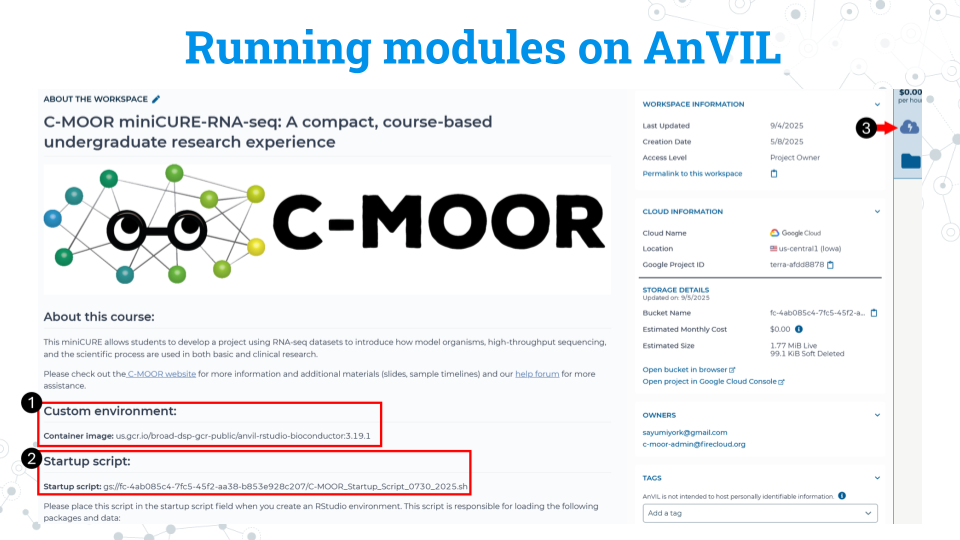
Take note of the container image for the custom environment. We recommend copying this to a word document or notepad. Make sure there are no spaces before or after what you copy. You will need to input this URL soon.
Take note of the startup script. Make sure there are no spaces before or after what you copy. This script is held in the original workspace everyone cloned. It does not have to be in your own workspace for it to work. You will need to input this URL soon.
Click on the Environment Configuration button , the cloud with a thunderbolt.
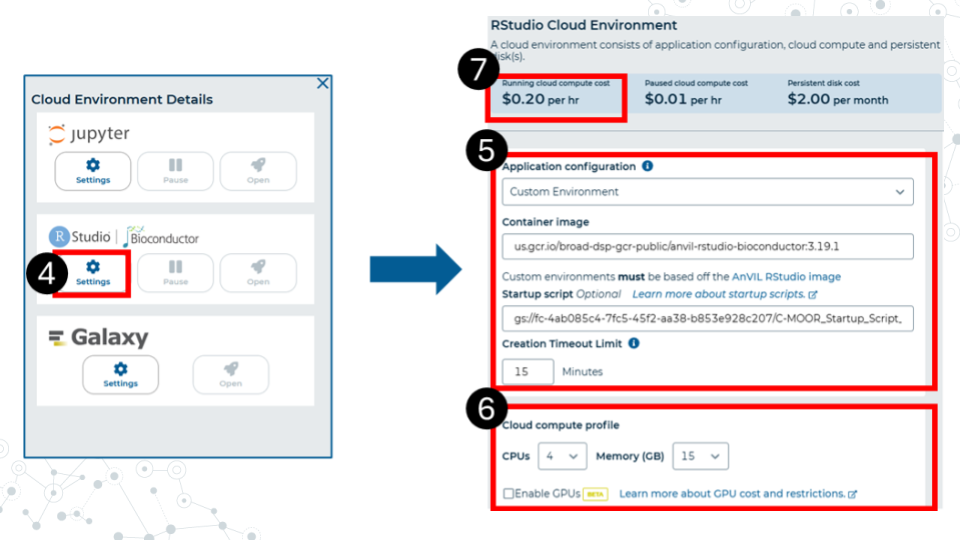
In the RStudio section, click Settings.
Make sure you have the following settings matching these instructions. Under Application configuration, choose “Custom environment”. In the container image field that appears, paste the container image URL that we copied earlier from the workspace. The URL should end with Bioconductor 3.19.1. In the startup script field, paste the URL for the startup script. This URL contains the words C-MOOR Startup Script. Set the creation timeout limit to 15 minutes.
Select 4 CPUs and 15 gigabytes of memory.
Confirm that the cloud compute cost is 20 cents per hour. If it is not 20 cents per hour, reselect CPUs and memory allocation in part 6. This is a known bug in AnVIL at the writing of this guide.
Scroll to the bottom of the window and click “Create”.
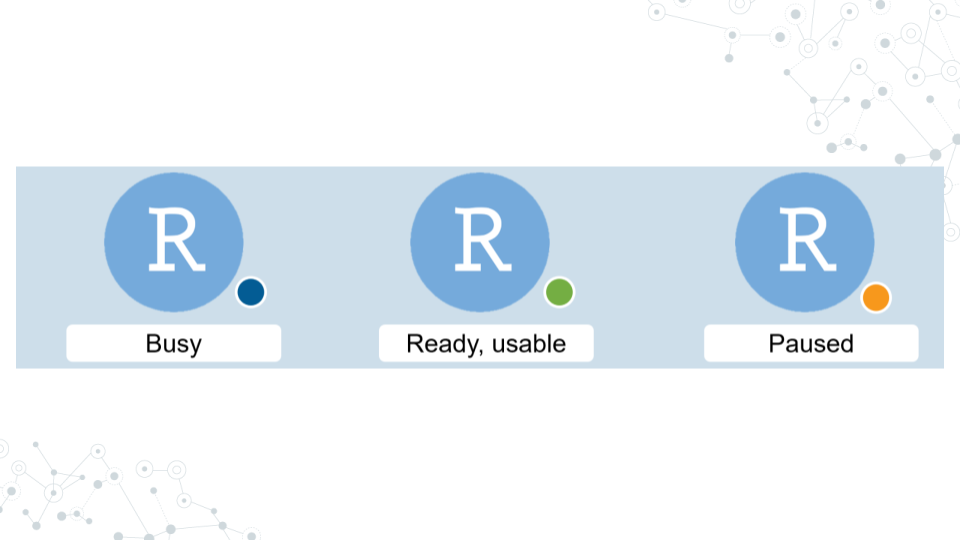
It will take some time for the RStudio Environment to be created. You can keep track of the status of the environment based on the colored dot next to the RStudio icon. The dot will turn green when the environment is ready. While it is loading (blue), you cannot interact with it.

- When the environment is ready, use the Open RStudio button that will pop up. You can also access RStudio through the Analyses tab. If you hold down Ctrl as you click, you can open RStudio in a new window.
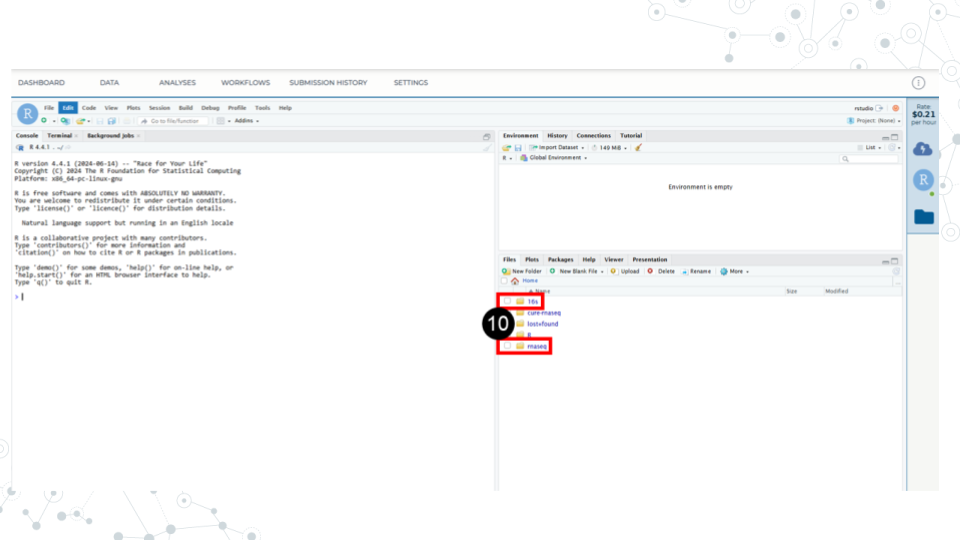
- Use the file explorer in RStudio to navigate to your module of choice. First, enter the folder of the curriculum you are using, either rnaseq (not cure-rnaseq) or 16s. Then enter the folder of the module you want to run.
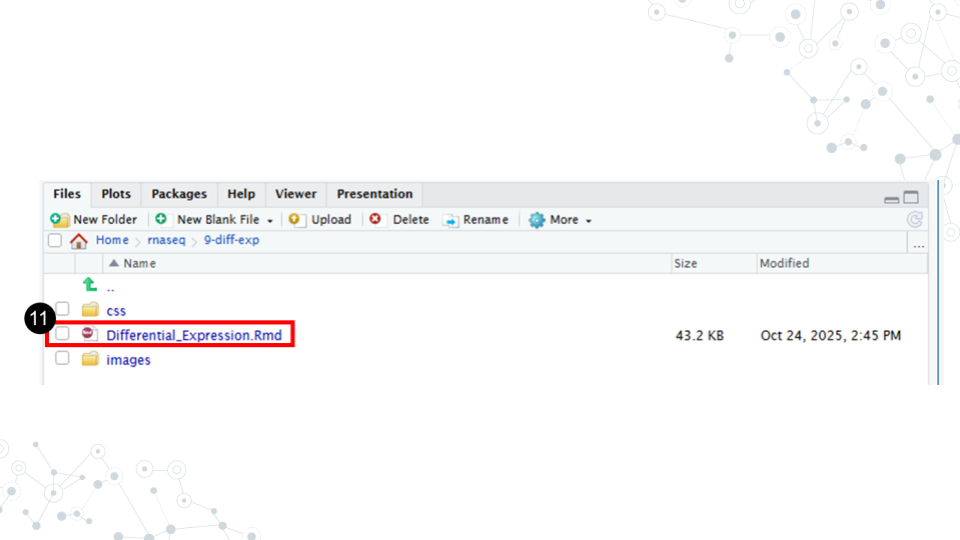
- In the module’s directory, open the .Rmd file by double clicking its name.
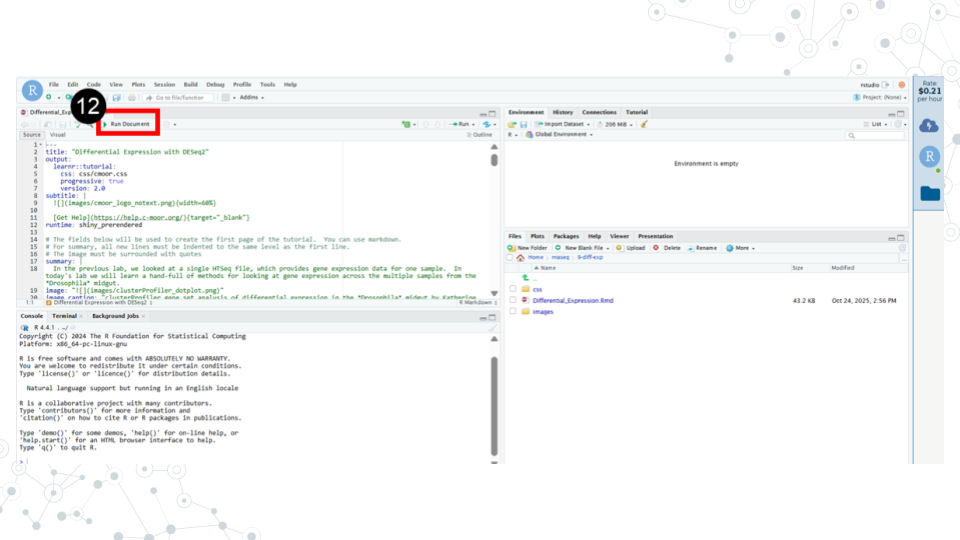
- Click Run Document in the open .Rmd file
When you are finished, make sure you close out your session properly to prevent runaway costs!.
4.4.3 Closing out a session on AnVIL
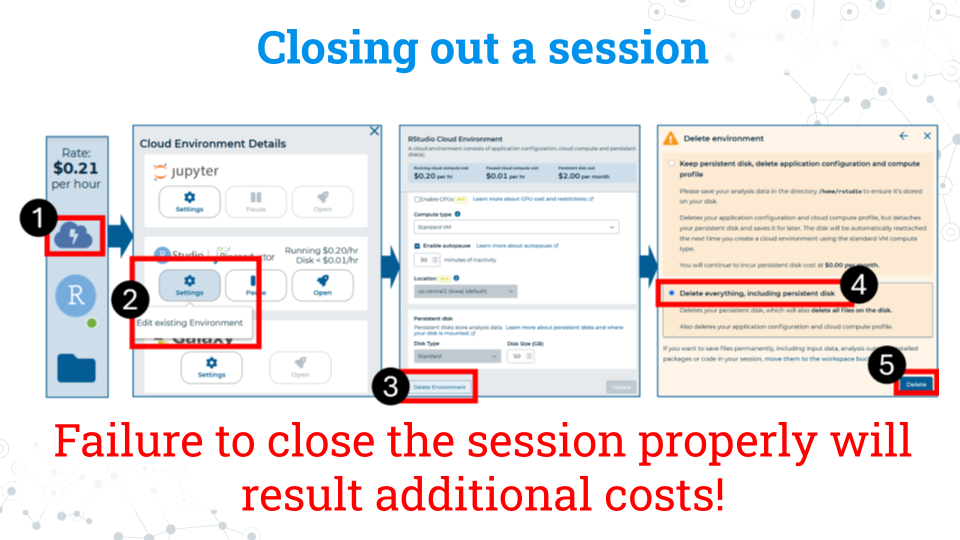
- On the right side of the screen, click the Cloud Environment button. This is the Cloud with the lightning symbol.
- Under the RStudio section, click settings.
- Scroll to the bottom of the new window and click delete environment.
- Check Delete everything, including the persistent disk or your instructor’s billing account will incur costs for storage.